Just in case you are not familiar with what DKIM is all about but still interested, I suggest you first read Use DKIM to validate outbound email sent from your custom domain in Office 365. If you’re looking for detailed instructions on how to enable DKIM in Office 365, continue reading.
Prerequisites
- Windows PowerShell
- PowerShell Script Validate-DkimConfig.ps1 download from here
- Access to Exchange Online through PowerShell
- Access to DNS
Update 23.3.2020 The above link to the script is no longer working, so you can get the script from here: https://gist.github.com/alexverboon/cbe8c6964b5af01bfb3f43dd605acee4
Connect to Exchange Online
First we connect to Exchange Online using PowerShell.
$UserCredential = Get-Credential
$Session = New-PSSession -ConfigurationName Microsoft.Exchange -ConnectionUri https://outlook.office365.com/powershell-liveid/ -Credential $UserCredential -Authentication Basic -AllowRedirection
Import-PSSession $Session -DisableNameChecking
MFA Enabled?
If you have Multifactor authentication enabled, make sure you follow these instructions to connect to Exchange Online. Once you have the MFA-enabled module installed, you can run the below command and once that has loaded run Connect-EXOPSSession.
$CreateEXOPSSession = (Get-ChildItem -Path $env:userprofile -Filter CreateExoPSSession.ps1 -Recurse -ErrorAction SilentlyContinue -Force | Select -Last 1).DirectoryName
. "$CreateEXOPSSession\CreateExoPSSession.ps1"
If all went fine, you should see something like this:

Check current DKIM configuration status
Run the following command to see current DKIM configuration:
Get-DkimSigningConfig
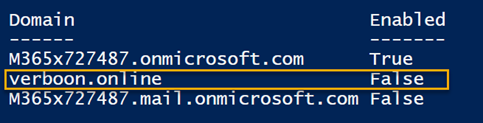
As we can see, DKIM is not enabled for Verboon.online.
Gather required settings for DNS
To enable DKIM we must add two CNAME records to DNS, and we use the Validate-DkimConfig cmdlet to provide the detailed information we must set in DNS.
Load the functions included in validate-dkimconfig.ps1 and then run validate-dkimconfig as shown below.
PS C:\temp> . .\Validate-DkimConfig.ps1
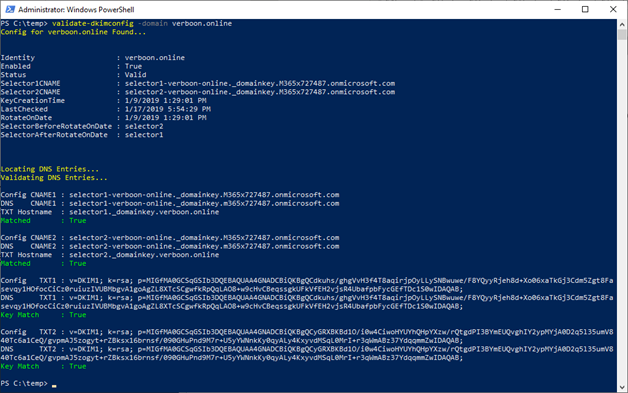
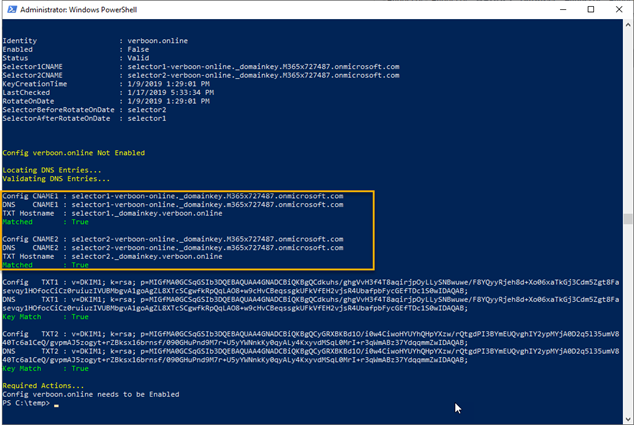
PS C:\temp> validate-dkimconfig -domain verboon.online
You should get output as shown in the example below.
The important information is displayed at the very end, with pretty clear instructions.

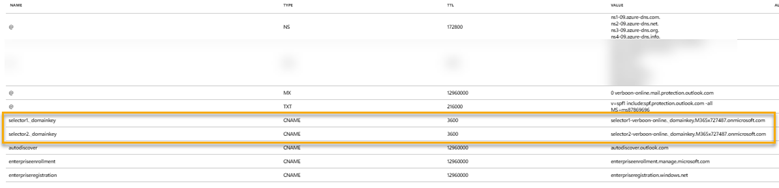
Registering DKIM in DNS
I host my DNS in Azure, so I am going to add the CNAMEs there.
Then run the following command again:
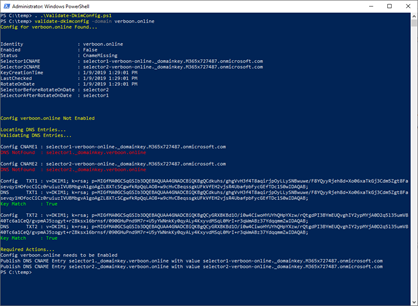
PS C:\temp> validate-dkimconfig -domain verboon.online
If the DNS records are active, you should see the following output.
Enable DKIM
Now that we have the DNS records published, we can enable DKIM. This is done by running the following commands:
New-DkimSigningConfig -DomainName Verboon.online -Enabled $true
Get-DkimSigningConfig

And finally, run the following command again to validate all is configured correctly:
PS C:\temp> validate-dkimconfig -domain verboon.online