I spend quite some time during the week travelling to and from customers, to make the best use of travel time, I usually read blogs and tweets or take online trainings to keep myself up to date about whatever interests me. Yesterday I noticed a tweet from someone regarding MDATP Portal access “Security Administrator can’t be assigned to staff in my org. It’s too powerful.” Maybe not everyone is aware of the RBAC capabilities in MDATP so I through it might be worth a blog post. Here we go.
By default, when setting up the Microsoft Defender Advanced Threat Protection portal, users with the Global Administrator or Security Administrator directory role in Azure AD, are automatically assigned the default Microsoft Defender ATP administrator role with full access to everything with the portal, i.e. resources and configuration settings.
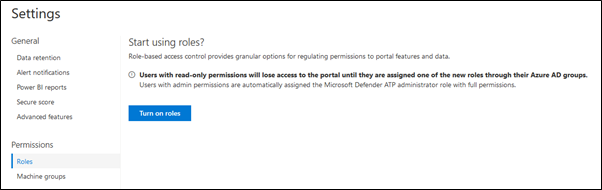
While this configuration might work just fine for a small shop, where Mary or Joe take care of everything in IT, mid to large sized organizations usually have different roles within IT and want to apply more granular access permissions within the MDATP console. Luckily MDATP does provide RBAC, it just needs to be turned on.
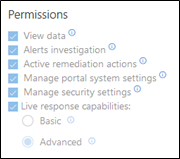
Now before you just hit that button, let’s first take a look at the available permissions and the prerequisites. Setting up MDATP Roles basically consists of assigning MDATP portal permissions to an AzureAD group, the following table provides an overview of the permissions that can be assigned to groups.
Permission
Description
View Data
- View Data
Alerts Investigation
Manage Alerts
Initiate automated investigations
Run scans
Collect investigation packages
Manage Machine tags
Active Remediation Actions
Take response actions
Approve or dismiss pending remediation actions
Manage Poral System Settings
Configure storage settings
Configure SIEM and Threat Intel API Settings
Configure Advanced Settings
Configure automated file uploads
Configure roles and machine groups
Manage Security Settings
Configure Alert suppression settings
Manage allowed/blocked lists for automation
Manage folder exclusions for automation
Onboard and offboard machines
Manage email notifications
Live Response Capabilities (Preview)
Basic: Start a live response session, Perform read only live response commands on remote machine
Advanced: Download a file from the remote machine, Upload a file to the remote machine, View scripts form the library, Execute scripts from the library on remote machines
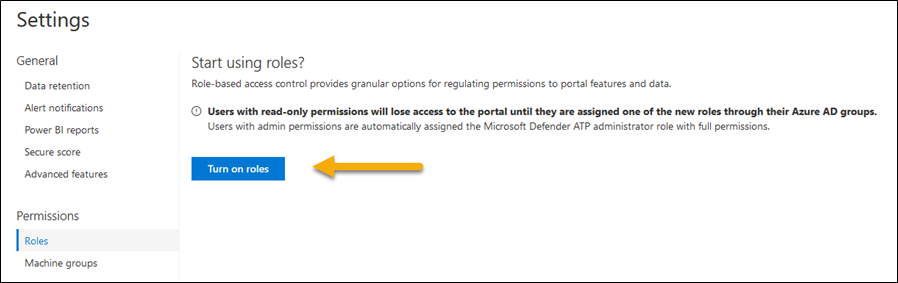
As you can see there are several permission sets that allow for a fine-grained setup of different roles within the Microsoft Defender Advanced Threat Protection portal. I Know you now want to push that “Turn on Roles” button but let us first think what we actually need and prepare the prerequisites.
First we need to define who within the organization should have access to portal and what we want them to do there and whether that applies to all onboarded machines or just a group of machines, yes you can create machine groups as well and assign permissions to them. So as a next step we identify the roles and map the permissions as well as the machine scope and the AzureAD group.
Below is an example of the outcome of such an exercise.
IT Role
Description
MDATP Permission
Machine Scope
Azure AD Group Name
MDATP Full Admins
Security architects and administrators who are responsible for the MDATP Solution. They closely follow the MDATP roadmap, test new features, enable / disable features, the go to persons for MDATP in the organization.
Manage Poral System Settings
All
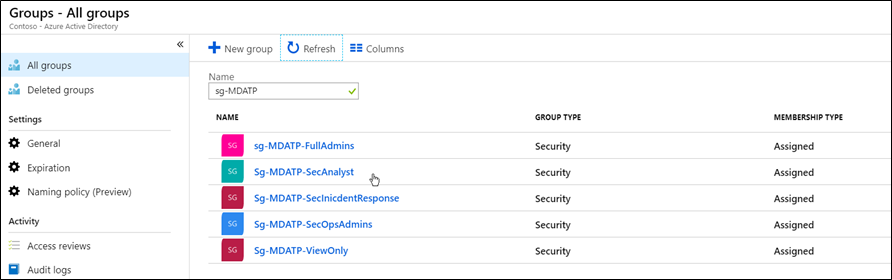
sg-MDATP-FullAdmins
MDATP SecOps Admins
Security administrators involved in Security Operations, use this if you don’t have separate analyst and response teams.
Manage Security Settings
Alerts Investigation
Active Remediation Actions
Live Response Advanced
All
Sg-MDATP-SecOpsAdmins
MDATP-View-only users
Users who only need to have view access but don’t push any buttons, CISO, IT Security Management.
View Data
All or scoped
Sg-MDATP-ViewOnly
MDATP Security Analysts
Users involved in assessing incidents
Alerts Investigation
Live Response Basic
All or scoped
Sg-MDATP-SecAnalyst
MDATP Security Incident Response
Users involved in incident response activities
Active Remediation Actions
Live Response Advanced
All or scoped
Sg-MDATP-SecInicdentResponse
Okay, we’re getting there, now that we know the roles and have defined the AzureAD groups, let’s put these in place first.
Good, we’re getting closer, but before hitting that button, make sure that you are currently a member of the either the Global Admins or Security Admins role, otherwise you might lose access to the portal. Within the portal, go to Settings / Permissions / Roles and select Turn on roles.
And if all goes well, after a few seconds you’ll see this.

Notice that there is already a built-in role, Microsoft Defender ATP Administrator (Default). This role has the following permissions.
All the permissions, so that looks like the Full Admin we defined previously. Open the Role and then search for the previously created AzureAD Group.
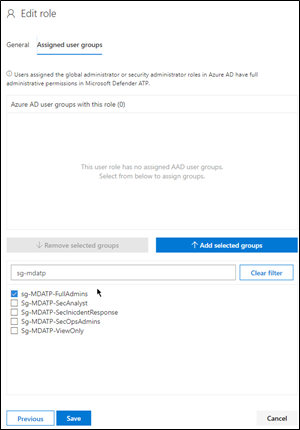
Select the Group and then press the Add selected groups button
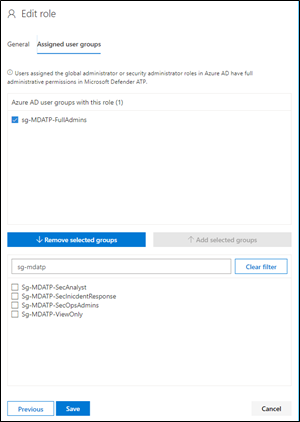
And finally click Save

Now let’s move on with the other groups. Select **Add Role **, enter the Role name , description and select the permissions
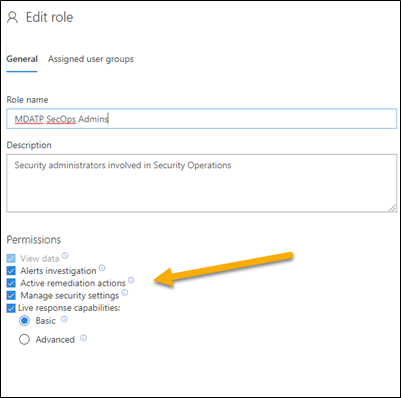
Select Next, and assign the corresponding AzureAD group.
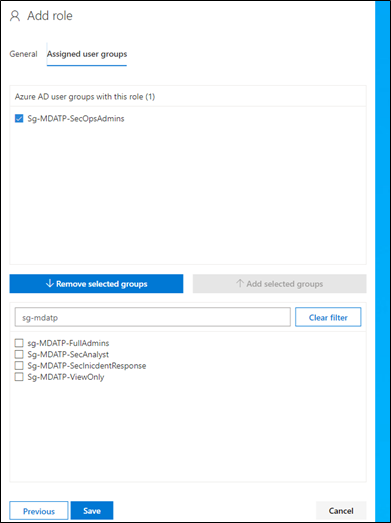
Click Save

If all these users regardless of their role are allowed to see any onboarded device, we must update the default machine group configuration. Select Settings / Permissions / Machine Groups.

Then make sure that all groups are assigned access.
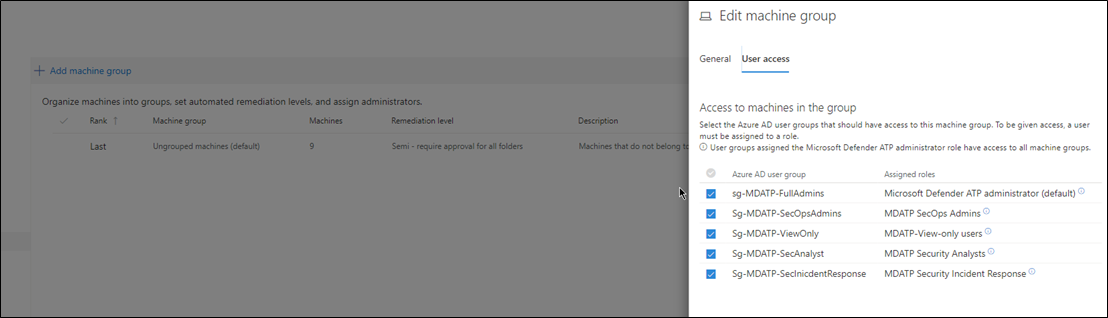
Important: select Apply changes

Okay that’s it for today, next time we’ll talk about the machine groups in more detail. Hope you enjoyed this blog post.
Alex
Additional Resources:
Is your SOC running flat with limited RBAC? https://techcommunity.microsoft.com/t5/Windows-Defender-ATP/Is-your-SOC-running-flat-with-limited-RBAC/ba-p/320015#M49
Manage portal access using role-based access control https://docs.microsoft.com/en-us/windows/security/threat-protection/microsoft-defender-atp/rbac